Saturday 31 August 2013

Roubo Work Bench Update.


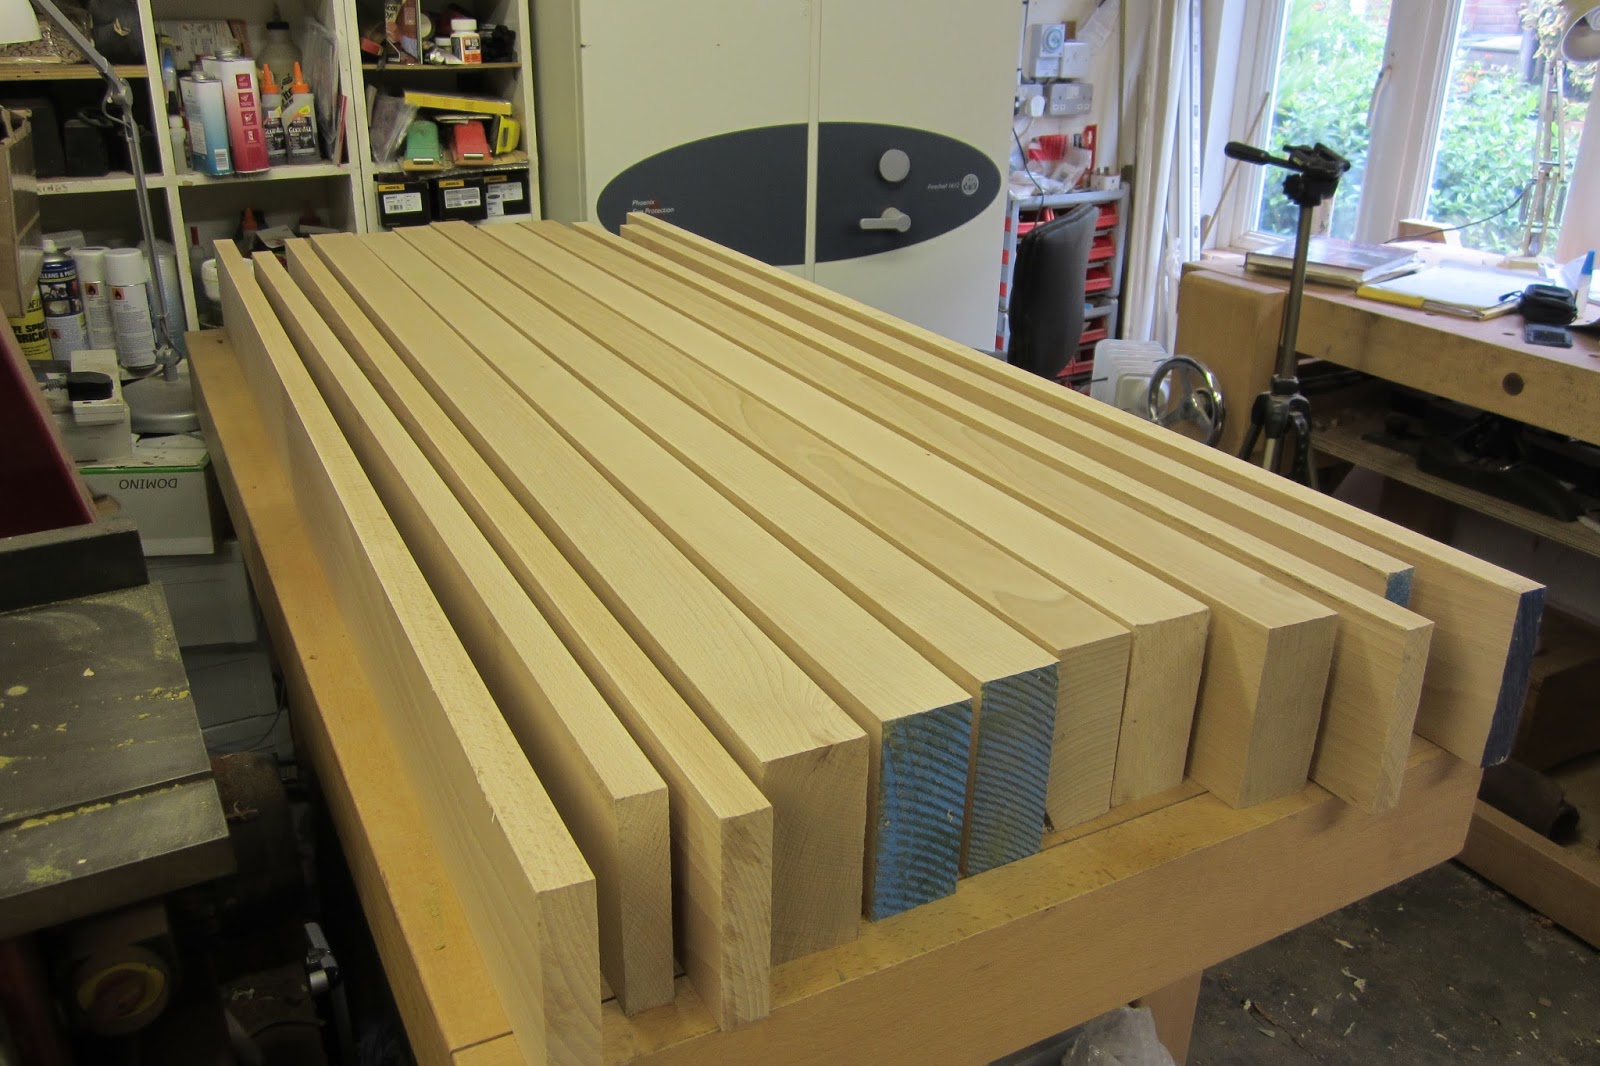
Laminating the top was slow progress, one board at a time on each half of the top to ensure no gaps or glue lines. Lie Nielsen bench tops are glued up with a massive hydraulic clamp all in one go, sadly I only have hand clamps.
The two halves were sent through the planer for a skim cut on each side.


The test fit on the legs in the mortices went well for all four legs, snug but not too tight.


I checked the two halves squared up nicely and looked for any gaps, I didn't want to force them together. The edges needed hand planing at certain points to improve the fit.


Clamp up time, note the two clamps on the ends just to ensure things stayed level.


Normally the nut for the bench screw is let into the rear of the leg, but seeing as I have a 2 1/2" screw tap and die, I decided to tap straight into the leg. Drilling the 2" pilot hole on the drill press.


This is die for the bench screw which was taken from my stock.


Here I am tapping the thread which needs a fair bit of force!


The finished thread and the test fit below. A little tight but that will soon loosen up with use.


I made the garter a snug fit and used Lignum Vitae for its oily, hard wearing properties.


Shaping the vice chop could be done with a forstner bit but I prefer to use my French curves for a nice sweeping curve. These were an antique set bought from E Bay and get plenty of use.


I decided to use a heavier pin than in the past, 16 mm (5/8") in brass. The holes were spaced at 10 mm (3/8") intervals and were staggered. I have some more benches to make so I made up a thick board ready to band saw down to size.


The peg board was attached with a through mortice and tenon and like the legs this was a flared mortice with carefully matched wedges.


The side frames were glued up with twin Dominoes which are plenty strong enough. The clamp half way up, was to fine adjust the slightly flared legs so that it was a perfect fit for the mortices in the top.
The legs were pre drilled on the drill press to accept the long stretchers which will be cut to length after the legs have been attached to the top. The underside of the top was oiled before assembly, it's much easier to do beforehand.
Tomorrow we'll see if it all fits!


Friday 30 August 2013

Yandles Show Next Week.


Yes it's show season again between now and Christmas, first up is Yandles on the 6th and 7th September. This is a very friendly show with the added benefit of being able to have a good rummage through their self selection wood yard. They always stock up well for the shows and I've bought some fine timber over the years.


Here's my stand from a couple of years ago.

Monday 26 August 2013

Roubo Work Bench Project


I've wanted to make a Roubo bench for some time now, which has allowed me the opportunity to give it plenty of thought. The first thing which would intimidate most people (including me!) from building one is the joinery for the legs, more like timber framing than cabinet making! The other issue is finding and then coping with a single board 5" thick by 20" wide by 5' long. Every other work bench has a top laminated from a number of boards and it struck me that with a bit of thought this could be a way of coping with the sheer mass of the top as well as simplifying the joinery. It would also provide a top which was dry, requiring a lot less attention over the coming years.
By using three sections of timber planed to 28 mm thick for both the legs and the corresponding area on the top the joints could be built up as you go. Above are the parts for the four legs and below are the components for the top, that was 4 hours work.


It also filled nearly three 200L drums of waste.


The next thing was to look at the through tenon. Roubo advised that any gaps in the joint were wedged for a nice tight fit and this is almost inevitable in such a large joint. Again this made me think, if you are going to wedge the joint, why not plan it that way in the first place. A wedged tenon would be a lot easier to assemble as the joint is only filled after the wedges have been hammered home, it would also be stronger if properly assembled.
 

Above is my layout and below are the band sawn cuts on the right and the finished tenon on the left. The shoulders add extra support and the wedges will bring the tenon back in line with the dovetailed tenon at the front in keeping with the original. The angles cuts make sure that the tenon bends nicely into position and was a technique I learned at the Barnsley Workshop http://www.barnsley-furniture.co.uk/superbasket/


Next was the dovetailed tenon which was cut on the table saw and finished off with a hand saw and chisels.

Assembly of the three parts of the leg was aided with the use of the excellent Domino machine to keep things in line.

Detail of the finished leg.


Next I cut the angles for the flared mortice, as well as the wedges, using the same 8 degree setting on the bevel gauge.


The purpose made wedge maker ensured that all the wedges were at the correct angle and exactly the same size, see below.


The wedges were dry fitted to check the angle against the mortice for a perfect fit, this took a couple of goes to get right.

Here's a picture of the wedged tenon with the mortice above. When this is assembled it will be for good!

Gluing on the side cheeks of the mortice, you can never have too many clamps!


Friday 23 August 2013

Dovetail Alignment Boards


I've been making some dovetail alignment boards from quarter sawn mahogany, it's stable and cheap.
When you buy one of my magnetic dovetail guides this is a great first project to make, you can leave the boards over length and cut off any poor fitting joints and try again. Despite this I'm surprised at how many woodworkers still want to buy a board rather than making their own. There are two shows coming up in September so it's time to stock up.


The dovetail joint takes just under 20 minutes to cut and fit in this 3/4" stock. The base line gets left in in, as the board may loose some accuracy in planing it out. I know some people hate seeing the baseline but I don't mind either way.


Here is the batch complete with the side fences attached and my new name badge glued in place.


I called into Tyler Hardwoods today, a great wood yard in Hungerford  http://www.tylerhardwoods.com/page/home I picked up some fine boards of beech which are going to become a Roubo work bench. I have long admired this style of bench with it's simple rock solid design and massive top and the recent project in the US has pushed me to get started  see the Benchcrafted blog for some great pictures http://benchcrafted.blogspot.co.uk/


While I was there I had a good look round for some figured stock, there was some ash and some soft maple but the figuring only went part way through, I'm getting fussy in my old age! After rejecting that, the very helpful staff pulled out a board of figured oak which had been rescued from the flooring pile, at 8' long this will make plenty of beautiful panel or box lids. It has come to a good home.


Sunday 18 August 2013

New Dovetail Guides Have Arrived!!!!!!


Well here they are at long last! They are all numbered from 1:4 through to 1:8 and coloured coded as well.

A batch of number 4's, this was the angle I was really looking forward to trying. Although the guides are being made for me there is still a lot of work involved in getting them ready for sale. The name disc and magnets need gluing in, the abrasive pads and slick tape need cutting and attaching and the box with the instructions, spare pads and label need making up.


All the guides are now branded with a stainless steel name disc which I think turned out very well. The existing stock of 1:6 aren't branded, until the stocks run out which won't take long.


A made up a sample joint for each angle so that  hopefully the result can be gauged before making a purchase, unless of course all five are bought!


1:8 is the traditional dovetail angle for hard woods although of course you can use any angle you like. The 8 and the 7 are probably not best for soft woods though. This is the angle I've had the most requests for.

1:7 was the angle the late great Alan Peters used (who am I to argue!)


1:6 is the angle the guide has been produced in up until now.


1:5 also looks nice.


And heere's the 1:4 which I've been looking forward to getting my hands on. The pins need to be kept quite thin to help balance the steep angle but I think it looks great!


To show comparisons, above is the 4 and the 5.


The 5 and the 6.


The 6 and the 7.


and finally the 7 and the 8. If you need to know which is which, it's time to get some new glasses!
They are all ready to ship now and the best bit is the price has stayed the same at £29.